 United Arab Emirates

 Saudi Arabia
 Maroc
Maroc Egypt
Egypt Turkey
 Vietnam
 United States
Shijiazhuang Haosen Business Service Co., Ltd.
China Manufacturer with main products: Light Weight Wall Panel Machine, EPS Foam CNC Cutting Machine, CNC Hot Wire Foam Cutting Machine, Concrete Block Machine, EPS 3D Panel... |

Related products from verified members


| Export Markets: | North America, South America, Eastern Europe, Southeast Asia, Africa, Oceania, Mid East, Eastern Asia, Western Europe |
|---|
Quick Details
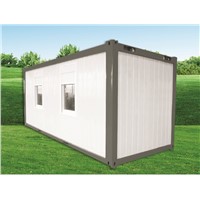
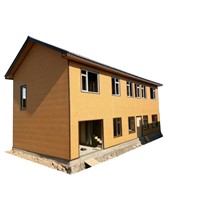
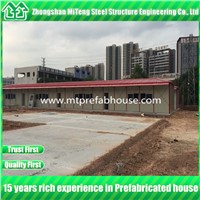
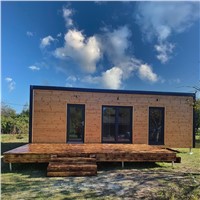
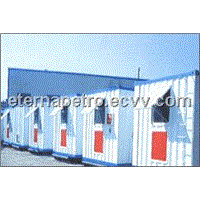
- Use: House,Warehouse
- Material: Sandwich Panel
Specifications
EPS 3D panel Installation
1.Install 3D wall panel
①Rebar installation
Install rebar on foundation beams, floor slabs, columns and beams, where the panels are to be installed. The rebar are installed in an alternating (" zigzag" ) pattern. For steel structures, the rebar are welded onto the steel beams and columns.
②Attach the 3D panel together
Prepare panels according to plan drawings, or trim panels if they arrive in modular typical sizes, according to the needs. Tie the panel onto the rebar using tie wire.
③ Window & Door
The opening of window and door should be cut well before install the wall panel.Install cross braces on each corners of door and window openings, on both side of the panels. Mount U-mesh around the perimeter of door and window openings.
④ Corner mesh
Install " U" type mesh or " Angle" mesh at each corner at full length of the corner on both inner and outerside. The angle mesh service as additional bracing to allow corner to function as columns after concrete is applied.
⑤ Support braces and alignment
Install supports, and perform alignment for the panels, so they are installed straight and each plane is perpendicular to each other.
⑥First plastering and guide installation
Apply first layer of concrete on both side of the panels, using shotcrete machine. Afterwards, install guidance to ensure consistent thickness of the second (final) layer of plaster.
⑦Second plaster
Apply the second layer of plaster, then smoothen the surface using screed.
⑧Skim coat/Finishing
Wall is ready for finishing by skim coat or paint.
2.Install 3D panel slab, floor panel, roof
①Installation of scaffolding and formwork
Install scaffolding and prepare formwork. If desired, fenolite sheeting can be applied at this stage.
②Panel and beam reinforcement installation
Place panels on top of formwork, tie them to installed rebar, insert steel reinforcement into the trenches on floor panels.
③ Concrete pouring/casting
Cast the void between formwork and the panels with concrete mix without aggregate, followed by concrete mix with aggregate for topping up and filling of the reinforcement trenches.
④Finishing
Screed surface until perfectly level. Afterwards, surface can be used to mount tiles, carpet, etc.

Service Guarantee
-

Free Service Charge
ECVV doesn't charge any service fee to Buyers for buying this product.
-

ECVV Supply
ECVV is responsible for supply, and provides product quality inspection, fund supervision and supply chain services.
-

Product Quality Commitment
ECVV China Sourcing Agent will assess the reputation and supply ability of the factory and conduct field trips to select the high-quality Chinese factories for buyers.
-

Deposit Service Commitments
In order to improve the quality of service, ECVV will charge for a 100CNY deposit for the agent purchasing order, and the deposit will be part of subsequent purchasing costs.
After paying a deposit, if the purchasing order is not completed because of unsatisfied ECVV services, ECVV will refund your deposit.


Panel House from this supplier

FOB Price: 190.00-240.00 USD/Square Meter
Min Order: 60 Square Meters
FOB Price: 40.00 USD/Square Meter
Min Order: 500 Square Meters
FOB Price: 2000.00-10000.00 USD/Set
Min Order: 1 Set
More products from other suppliers


Min Order: 1 Set


Min Order: 5 Sets
FOB Price: 800.00-2,000.00 USD/Set
Min Order: 30 Sets

Can't find a suitable Supplier or product? Entrust ECVV to purchase the well-chosen Chinese products with high cost performance.
Learn More>> Start Safebuy OrderCommunicate with Supplier
Sourcing from ECVV
 Contact Us
